
Pigu Integration: Setup and Invoice Management
2026-05-24The Pigu integration connects your Haiku account to the Pigu marketplace family — pigu.lt, 220.lv, kaup24.ee, and hobbyhall.fi — so you can view orders and create invoices without switching between systems.
Step 1 — Connect your Pigu account
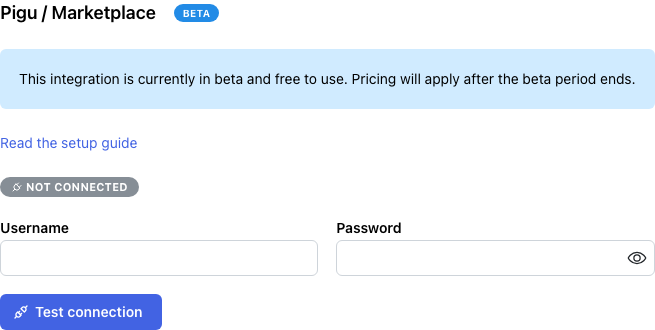
- Go to Settings → Pigu.
- Enter your Pigu seller username and password, then click Connect.
- A green Connected badge appears, showing your store name and the date the session expires.
Your credentials are used to obtain an access token.
Step 2 — Configure each country tab
After connecting, any marketplace channel your account is active on appears as a tab: LT, LV, EE, or FI. Open each tab you sell on and fill in the settings below.
Invoice numbering
| Field | What to enter |
|---|---|
| Invoice series | The series code for standard invoices (e.g. PIG) |
| Proforma series | The series code for proforma invoices |
| Credit note series | The series code for credit notes |
Seller information
| Field | What to enter |
|---|---|
| Seller | Your full seller block — name, address, etc. — as it should appear on invoices |
| Issuer | The person or role signing the invoice |
| Extra | Any text to print at the bottom of the invoice. Supports Handlebars templates with order and invoice variables. |
| Seller country | Your country of registration — defaults to the channel country, change only if different |
| Tax ID | Pre-filled from global settings; override here if this channel uses a different ID |
| Tax registration | Pre-filled from global settings; override if needed |
Example Extra configuration:
Order: {{app_name}}/{{external_id}}
{{#if invoice.invoiceReference}}Standard invoice reference: {{invoice.invoiceReference}}{{/if}}
{{#if invoice.buyerTaxId}}Reverse charge (Directive 2006/112/EC){{/if}}
VAT settings
These fields appear only when a Tax ID is set.
- Create VAT invoices — turn on to include VAT on invoices for this channel.
- Zero-VAT orders — enable if some orders qualify for zero-rate VAT (e.g. B2B cross-border sales).
Click Save after configuring each tab.
Step 3 — Start with manual invoice creation
Recommendation: Leave all automation off at first.
Open the Pigu Orders page, create invoices manually for a handful of real orders, and check that the series codes, seller block, and VAT amounts look exactly right. It is much easier to adjust settings at this stage than after hundreds of invoices have been generated automatically.
Once you are satisfied with the output, proceed to Step 4.
Step 4 — Enable automation (optional)
When you are confident the configuration is correct, you can turn on automatic behavior per channel:
| Setting | What it does |
|---|---|
| Auto-create standard invoices | A standard invoice is created automatically when an order is completed and paid |
| Auto-create credit notes | A credit note is created automatically when an order is returned or rejected |
| Auto-upload PDF to Pigu | The standard invoice PDF is sent to Pigu automatically after creation, making it visible to the buyer. Requires Auto-create standard invoices to be on |
| Send daily email digest | You receive a daily summary email of all invoices created overnight by the automation |
How the automation runs
The job runs once a day at 3:00 AM Vilnius time. Each run fetches orders updated in the last 48 hours across all your active channels (LT, LV, EE, FI), up to 5,000 orders per channel. Proforma invoices are never created automatically — only standard invoices and credit notes.
Tip: Enable auto-create first and monitor it for a day before turning on auto-upload. This gives you a chance to catch any formatting issues before buyers see the PDFs.
The Orders Page
Go to Pigu Orders to browse your marketplace orders and manage invoices manually.
Filters
Narrow the list by channel, order ID, order status (completed, returned, rejected), and date range (updated from / to). By default the page shows the last 24 hours.
Per-order actions
Each row shows the buyer, total, order status, payment status, and any invoices already created. In the Actions column:
- Create invoice — creates the next appropriate invoice. The button label tells you what will be created: Create proforma invoice, Create standard invoice, or Create credit note.
- Upload PDF — sends the standard invoice PDF to Pigu. Once uploaded, the button is replaced with the text Uploaded to Pigu.
Bulk actions
At the top of the page, two bulk buttons act on all eligible orders in the current filtered view:
- Bulk create invoices — creates invoices for every order that needs one.
- Bulk upload PDFs — uploads PDFs for every standard invoice that has not been sent yet.
A progress bar appears while the operation runs. If an error occurs, processing stops and the error is shown so you can investigate before retrying.